 07-01-2023
Update WordPress manually
WordPress can be manually updated as a last resort to bring some severely outdated versions back up to date. This is often a drastic operation, which may require some technical steps in some cases. And therefore may raise some questions. Therefore, in this blog post, let's cover all the steps for this, and how you can do this while preserving your WordPress website.
First step - Backup your entire website
Like more work on a website, this one starts with a complete website backup, which is easily done through MijnHostingPartner.com's control panel. By making a zip of the entire contents of the wwwroot. And then exporting the database via PHPmyAdmin.
Once you download it locally and put it in a folder, you have everything ready to go back to your previous website. And you run the least risk. If you don't do this, and it goes wrong, there is a chance that your website will be lost in its entirety. Which is not the intention, of course. So start by securing your website files.
Download a clean WordPress installation zip from the official website
Once you have backed up your current website then you can proceed to downloading a clean WordPress installation from the official WordPress website. This is because the work consists of overwriting the outdated files with a version installation. In which you only leave some files.
https://wordpress.org/
After downloading the WordPress zip you can unpack it locally with a tool of your choice. And keep it in a folder. After this you can proceed to the next step.
Preparing to overwrite the WordPress files
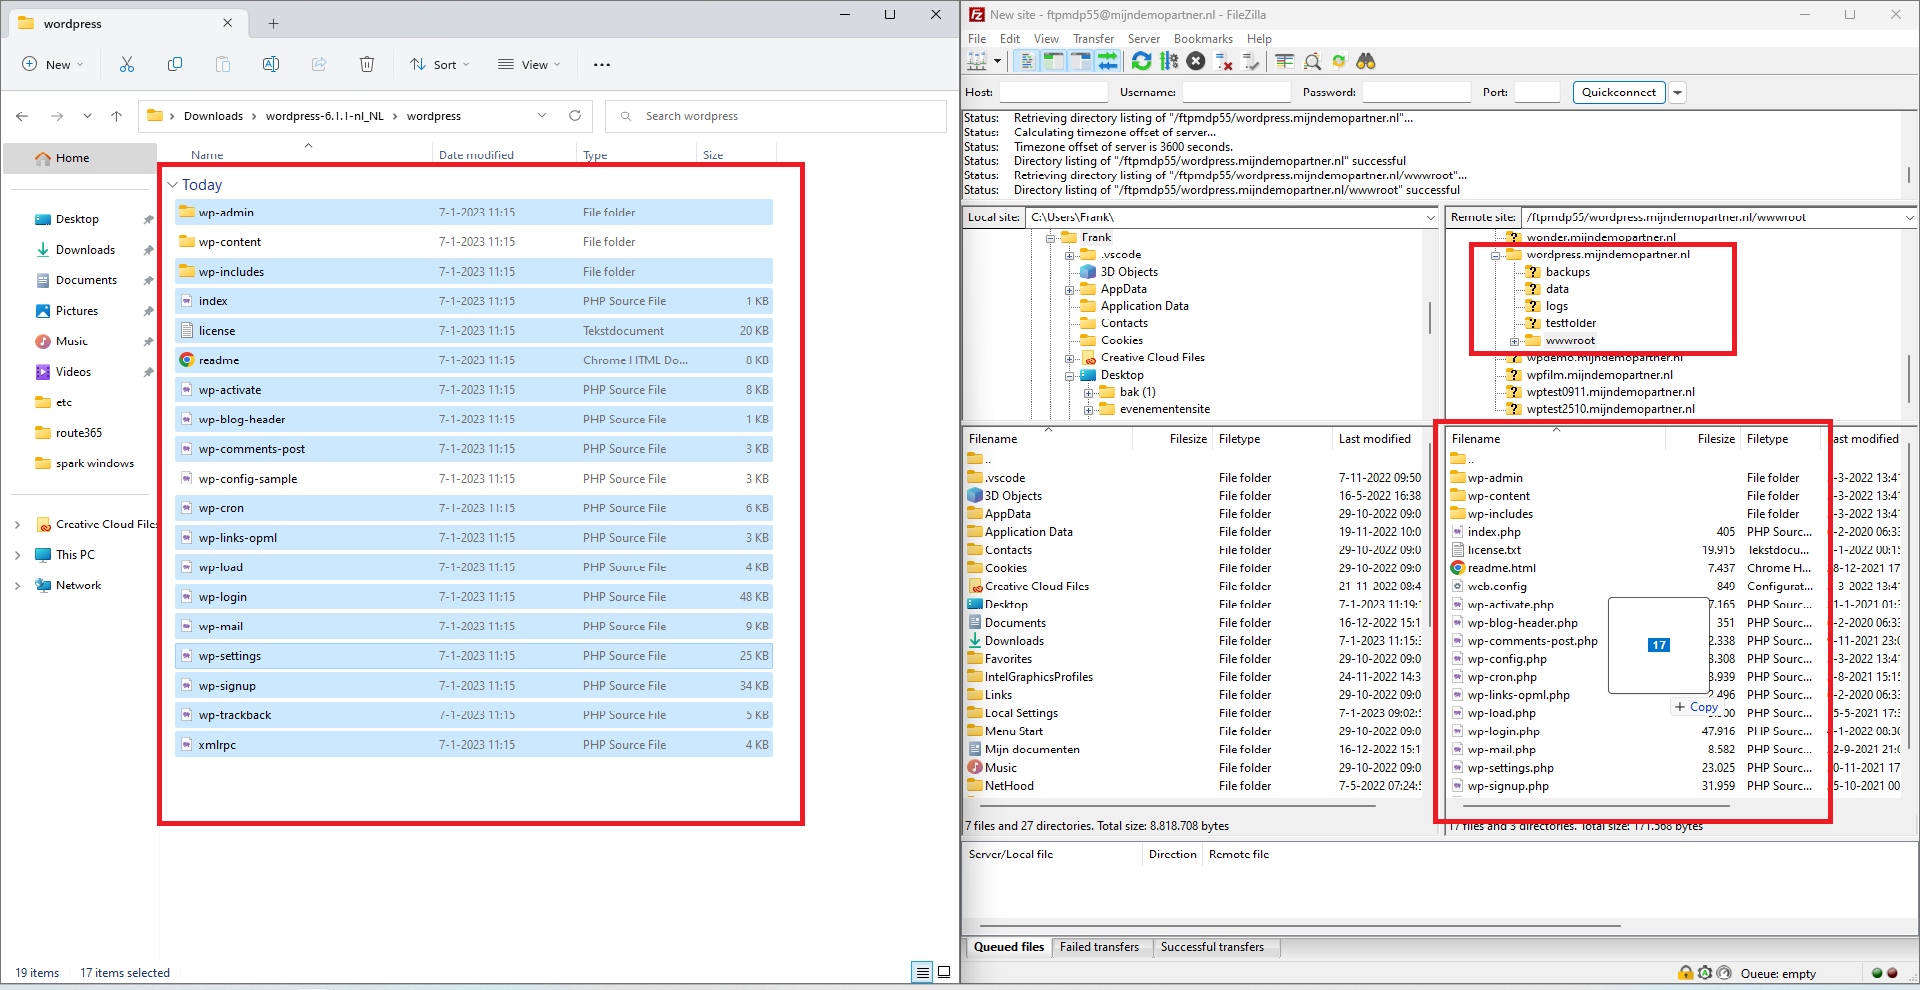
Once you have the WordPress installation files extracted into a folder you can set up an FTP connection next to it. This can be done in a number of different ways, but generally the FileZilla program is recommended for this purpose. WinSCP is also an option for this. With your files and connection ready, you can start overwriting the WordPress files, don't do this all at once though. But first read through in the next heading for all the steps for this.
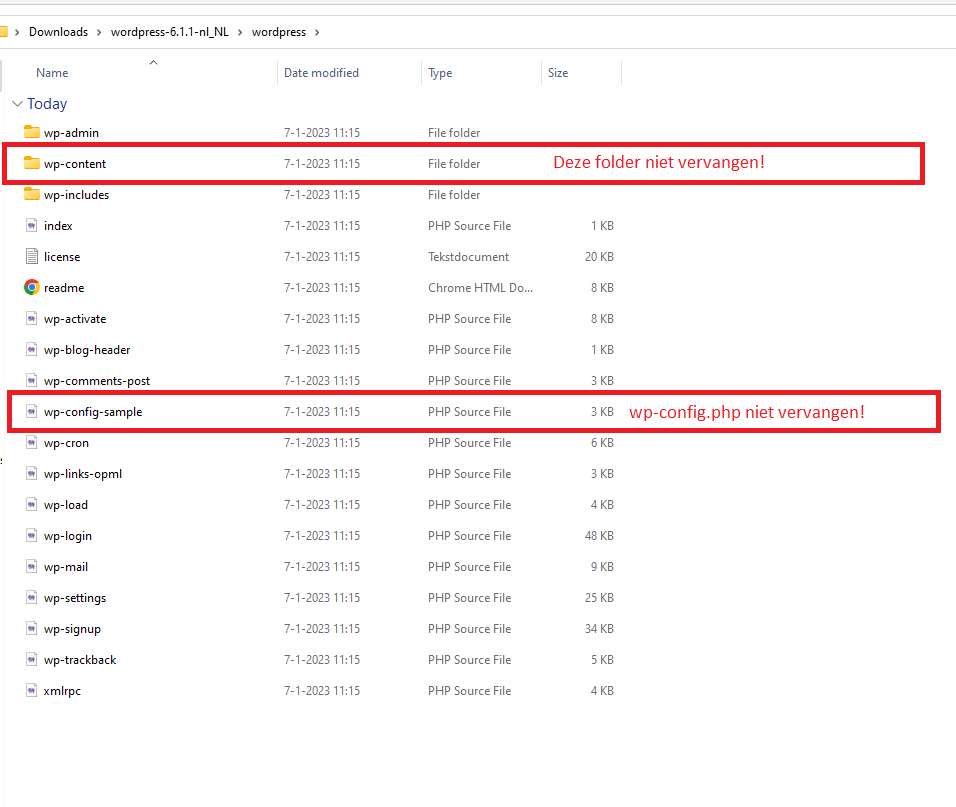
Overwrite the outdated WordPress files
Overwriting the outdated WordPress files is the step where things can go wrong, so make sure you don't overwrite the entire new WordPress installation over it. As you can see in the screenshot below, you can select all files except the wp-content folder and the wp-config.php file if present. By default, only the wp-config-sample.php file will be present in here. But this also does not need to be included. The remaining files can all be selected, and then overwritten within FileZilla or your FTP program of choice.
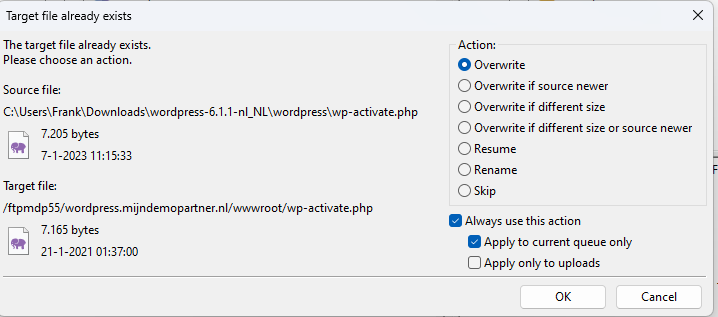
Once you have FileZilla open next to your unpacked WordPress files it is a simple matter of dragging and dropping the necessary files into the wwwroot of your website, which is open in FileZilla. With so be careful not to include the wp-content folder, and leave the wp-config.php file alone. This can all be overwritten, and so this can be chosen.
After overwriting the WordPress files with the new version, the website is updated right away, you can check this by logging in within your WordPress website. After this, navigate to the update section to see which WordPress version is running.
Updating the WordPress database
If the WordPress version was so outdated that your database may need to be updated, this is an automatic process, and will be prompted as soon as you log into the WordPress administrator environment. You need to agree to this before continuing. This should take no more than 5 minutes. If this takes longer than half an hour, something else will be wrong. Then reset your database from the backup you made, and do further research into your plugin list and WordPress versions for possible causes. In this, the WordPress support forums are also tools you can use to find the solution.
Test final things for operation, plugins, themes and the PHP version
After you have updated the Core of WordPress, it is important to check the rest for operation, and also update to the latest version where necessary. It is also possible that your theme or plug-in is no longer supported, and thus completely outdated. In that case, you will have to look for an alternative for it. There are thousands of plug-ins and themes within WordPress. So an alternative will be there in almost every case.
So check your website on the back end within the WordPress administrator, but also especially on the front end what the user will eventually see. Here you can then check for error messages and further components that may have moved or are no longer correct.
You should also check at the backend what PHP version is currently running, once you have installed the latest WordPress version and updated your plug-ins and theme it should often already be updated. This can be done to the highest available version.
Almost every theme covered in this blog post can also be found in our knowledge base, so keep it next to it as well if you are going to do this work. Don't want to deal with this kind of technical work yourself? Then also take a look at our Managed WordPress hosting packages, in this we make sure your WordPress website stays up to date and secure.